DIY Solar MeshCore Repeater: RAK19003 and 18650 Build Guide
How do you build a DIY solar MeshCore repeater? Put a RAK19003 WisBlock Mini, two or six 18650 cells, a battery protection board, and a 5 V solar panel in a sealed outdoor box, then add an outdoor 915 MHz antenna. It runs around the clock with no wall power.
These are the parts lists we use for repeaters around Bryan–College Station. There are three versions. The 2x uses two 18650 cells. The 6x uses six cells for long cloudy stretches. The upgraded build we call the GOAT adds a cavity filter, a real-time clock, a bigger box, and a pole mount. Every part we could find a listing for is linked. Prices were checked on Nov 1 and Nov 3, 2026.
Quick answer
For most rooftop or fence-post sites, build the 2x: a RAK WisBlock Mini kit, two Panasonic/Sanyo NCR18650GA 18650 cells in a parallel holder, a protection module that cuts off at about 2.9–3 V, a 5 V 6 W panel, a 5.8 dBi fiberglass antenna on an N-type bulkhead, and an IP65 box with a breather vent. Build the 6x if the site is hard to reach and you want more reserve for a gray week. Go GOAT when the repeater is a backbone site on a pole near other radios and you want it to survive power dips with the right time.
The hardware runs MeshCore or Meshtastic, your choice. Around Bryan–College Station, we recommend MeshCore so it joins the local repeaters, flashed as a repeater on USA/Canada (Recommended).
Parts list: Solar Repeater 2x (two 18650 cells)
- RAK WisBlock Mini starter kit, US915 (RAK19003 + RAK4631): Amazon or Rokland, about $31.97
- 5.8 dBi 915 MHz fiberglass antenna (N-male, includes mount and a 20 ft cable): Amazon, about $31.95
- U.FL to N-female bulkhead pigtail, 2-pack: Amazon, about $9.59 for two. A single one is also sold at Rokland
- IP65 hinged junction box, 5.9 x 3.9 x 2.8 in: Amazon, about $9.99
- 5 V 6 W solar panel with bracket: Amazon, about $14.97
- Dual 18650 holders, 6-pack (one holder per build): Amazon, about $7.99 (sold out? try this ACEIRMC 2-slot parallel holder 6-pack, $7.99 — parallel 3.7 V with wires, which is right for 1S)
- Panasonic/Sanyo NCR18650GA 18650 cells (3450 mAh, 10 A), x2: Rokland 2-pack, about $13.97 for two
- 1-cell Li-ion protection module (about 2.9–3 V cutoff per the listing): Etsy
- M12 breather vent, 4-pack: Amazon, about $7.88
- 3D-printed mounting plate (we print ours in PETG) and mounting hardware for your site
Parts list: Solar Repeater 6x (six 18650 cells)
The same as the 2x, with these changes:
- Six Panasonic/Sanyo NCR18650GA cells (three Rokland 2-packs, about $41.91) in three dual holders, all wired in parallel
- TangoSun 8 W 5 V IP65 solar panel in place of the 6 W: Amazon, about $15.99. It comes with a USB-C cable, not bare leads (see the solar section below).
- M12 breather vent, 2-pack (the one we used on this build): Amazon, about $8.19
Parts list: GOAT upgrade
Start from the 2x list. Swap the box and the antenna feed, then add these:
- Outdoor junction box, 8.6 x 6.7 x 4.3 in, IP67: Amazon, about $21.99
- Optional: 915 MHz cavity filter, SMA female both ends (for noisy sites, 902–928 MHz, 60 dB rejection): RF3C (ACASOM), about $65
- SMA-male to N-female bulkhead cable, 6 in (RG402), from the filter output to the box wall: Rokland, about $10.97 (pick the 6-inch RG402 Bulkhead option)
- U.FL to SMA-male pigtail, 12 in RG178, 5-pack from the radio to the filter input: Amazon, about $9.99 for five
- RAK12002 real-time clock module: Rokland, about $14.97
- Stainless pole-mount brackets with 2–8 in clamps: Amazon, about $13.99. Check the fit before you buy: 1-1/4 in pipe is about 1.66 in across, below the 2 in minimum.
- PG9 cable glands, 40-pack (for the solar lead): Amazon, about $8.99
- About 1 ft of 1-1/4 in steel pole from a local hardware store
Consumables
- USB-C male solder connectors, 20-pack: Amazon, about $9.99
- USB-C female to 4-pin lead, 5-pack: Amazon, about $9.99
- M2 heat-set inserts: Amazon, about $5.99 · M3 heat-set inserts: Amazon, about $9.99
- Gorilla Clear Grip: Amazon, about $5.99 (sold out? try this Gorilla Clear Grip 3 oz 2-pack, $15.47 — general-purpose contact adhesive, not the Diamond Art & Jewelry bottle)
- Zinsser shellac spray to seal printed parts: Amazon, about $14.96 (sold out? try this Bulls Eye clear shellac 12 oz spray from another seller, $28.28 — same product, about twice the price)
- Hookup wire, solder, heat-shrink, and silica gel packs for the box
Several of these come in multi-packs, so a second repeater costs noticeably less than the first.
The radio: RAK WisBlock Mini

The RAK WisBlock Mini kit pairs the RAK19003 Mini base with a RAK4631 core (an nRF52840 with an SX1262 LoRa radio). It is the board we see most on solar repeaters because it idles at very low current, and it's the same base we use in our DIY MeshCore companion node. RAK's datasheet gives the base board a 2 mm JST PH battery jack (4.3 V max), a 1.5 mm JST ZH solar jack (5.5 V max), a 350 mA charger, and an operating range of −35 to +75 °C. The Amazon listing says it ships with Meshtastic installed, so you'll reflash it with MeshCore.
Power: two or six 18650 cells, protected

We use Panasonic/Sanyo NCR18650GA cells (Rokland 2-pack). Rokland sells a Sanyo-label and a Panasonic-label version of the same cell, and only the Panasonic one was in stock on Nov 3, 2026. The listing gives 3,450 mAh typical (3,300 mAh rated), 10 A continuous, 3.6 V nominal, and 4.2 V max. The cell's specification sets a 2.5 V discharge end voltage. They sit in dual 18650 holders.
Wire the holders in parallel, never in series. The RAK battery jack takes one Li-ion cell's voltage (3.7 V nominal, 4.3 V max). Two cells in series would put about 8.4 V on it and destroy the board. If the original holder pack is sold out, the ACEIRMC 2-slot parallel holder 6-pack ($7.99) is the same idea — parallel 3.7 V with wires, not series. In parallel, the 2x gives you about 6,900 mAh (about 24.8 Wh at 3.6 V nominal) and the 6x about 20,700 mAh (about 74.5 Wh), all at single-cell voltage. Only parallel cells that are the same model and at the same charge.
Why a separate protection module
The NCR18650GA is a bare, unprotected flat-top cell. Something has to stop it from being drained flat during a long cloudy week. We put a 1-cell protection module between the cells and the RAK's battery jack. Its over-discharge cutoff is about 2.9–3 V per the listing. The listing also gives a 4.25 V overcharge cutoff and a 2 A rating. The cells go to the module's BATT side and the RAK to its PWR side. Both are JST PH 2.0 plugs, so check polarity.
We picked this module on purpose. The cheap protection boards we looked at on Amazon and Rokland cut off around 2.4–2.5 V, at or below the cell's 2.5 V end voltage, so they let the cells run as low as the cell maker allows or lower. Cutting off at about 2.9–3 V leaves margin and is easier on the cells over hundreds of cycles. The module also adds short-circuit protection on the pack.
Charging and heat
The RAK charges the pack from the panel through its built-in charger, at roughly 350 mA at most. Lithium cells must not be charged below 0 °C, and the RAK19003's datasheet lists no battery temperature cutoff, so the panel will keep charging a frozen pack. On the rare freezing mornings here, that is worth knowing. The 6x is not about charging faster. It is about riding out several gray days in a row. From empty, a 20,700 mAh pack takes days of good sun to refill, which is fine for a repeater that rarely drains that far.
Heat matters in Texas. The NCR18650GA specification allows charging from 10 to 45 °C, and from 0 to 10 °C only at reduced current. A sealed box in afternoon sun can get hotter than that. Use a light-colored box, mount it where it gets afternoon shade, and read our heat, humidity, and lightning guide before you bolt it to a south wall.
Solar panel

The 5 V 6 W panel is sold for security cameras. It comes with a wall bracket and a long lead with a micro-USB plug and a USB-C adapter. The 6x build moves up to the TangoSun 8 W 5 V IP65 panel. It ships with a USB-C cable (plus micro-USB and DC barrel adapters), not bare leads. We have not tested its real output yet.
You have two ways to connect either panel, and both feed the same charger:
- Into the RAK's USB-C port. RAK rates USB-C charging at 4.5 to 5.5 V.
- Cut the plug off and wire it to the RAK's 1.5 mm JST ZH solar jack. RAK's datasheet calls it a 5 V solar input and lists 5.5 V as the maximum there.
Either way, measure the panel's output with a meter in full sun before you connect the board. Some Amazon reviewers say the 6 W panel puts out less than 6 W, and one says it measured about 7 V. Anything over 5.5 V can permanently damage the RAK. If yours reads high, add a 5 V regulator. Bring the lead into the box through a gland, not a loose hole.
Antenna and feedline

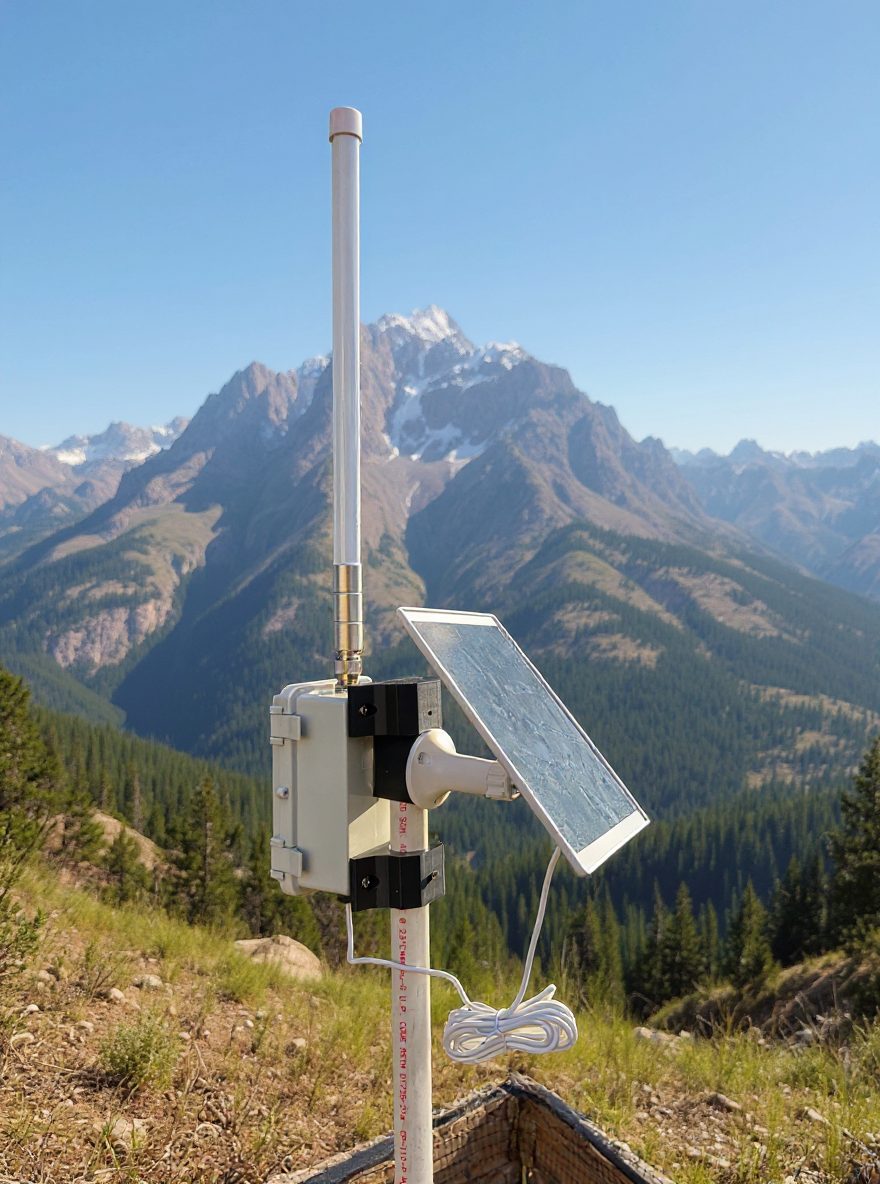
The 5.8 dBi fiberglass antenna is about 16 in tall, with an N-male connector, a mount kit, and a 20 ft cable. On the 2x and 6x we skip the long cable. A U.FL to N-female bulkhead pigtail goes through the box wall, the U.FL end clicks onto the RAK4631's LoRa jack, and the antenna screws straight onto the bulkhead. Fewer adapters means less loss. Treat the 5.8 dBi figure as marketing until you have measured it. A few Amazon reviewers say it does not seem tuned for 915 MHz, while others report long-range contacts. Our 915 MHz antenna upgrade guide covers other outdoor options.
Seal the bulkhead and the N connection against rain. Height still beats gain. What a rooftop repeater changes explains why.
Box, vent, and an optional outside USB-C port

The IP65 hinged box holds the 2x build on a printed plate. The listing gives an inside size of about 5.1 x 3.1 x 2.6 in. Add an M12 breather vent so the box can equalize pressure as it heats and cools. Without one, Brazos Valley humidity condenses inside. Toss in a silica pack too.
If you want to reflash or reconfigure without opening the box, mount a USB-C female 4-pin lead in the box wall and wire it to a USB-C male plug that goes into the RAK. In our testing, a 4-wire connection (VCC, GND, D+, D−) was enough to flash and configure the node. Cap the outside port when you are done.
The GOAT upgrade: what each extra part buys you
"GOAT" is just what we call our best build, the one we put on sites that matter most. Here's what each extra part does, and when it's worth the money.
Cavity filter: keeps strong nearby signals out
The 915 MHz cavity filter is an optional add-on for noisy sites, about $65. It passes 902–928 MHz and rejects everything else. The seller lists at least 60 dB of rejection 10 MHz outside the band and no more than 1.0 dB of insertion loss. That matters on poles, towers, and rooftops near cell sites, paging transmitters, or other strong radios. Those signals can swamp a LoRa receiver even though they are not on 915 MHz, and the repeater quietly goes deaf. On a backyard fence far from other transmitters, you probably won't notice a difference, and you lose about 1 dB. The listing says the filter is for indoor use, so it lives inside the sealed box.
The GOAT feed runs like this: RAK4631 U.FL → a U.FL to SMA-male pigtail → filter → 6-inch SMA-male to N-female bulkhead cable mounted through the box wall → the antenna's N-male connector.
RAK12002 real-time clock: right time after a power dip
The RAK12002 is a small RV-3028-C7 clock module that plugs into a sensor slot on the RAK19003. A supercapacitor keeps it running through a power loss. Without it, the repeater forgets the time whenever the battery runs flat. MeshCore's source auto-detects this clock chip.
To be clear: a wrong clock does not stop a MeshCore repeater from forwarding packets. It does make the repeater's own adverts carry the wrong time. That can make the repeater look stale on maps and in companion apps until someone runs a clock sync. On a pole you can't easily reach, the RTC saves that trip. Some users reported that MeshCore 1.14.1 stopped reading this module on RAK boards. That bug report was closed without a clear fix, and we have not confirmed that current MeshCore firmware reads the module on this board. After you flash, power-cycle the node and check the clock.
Bigger box, pole brackets, and glands
The 8.6 x 6.7 x 4.3 in IP67 box gives the filter, the RTC, and the two-cell pack room to breathe. It also leaves air space around the cells, which helps in summer. The stainless pole-mount brackets clamp the box to the pole. Check the fit first: the listing gives the clamp range as 2 to 8 in, and 1-1/4 in steel pipe is about 1.66 in across, so you may need a smaller band clamp. PG9 glands seal the solar lead (they fit 4–8 mm cable). The coax doesn't need a gland. The 6-inch RG402 cable's N-female end mounts through the box wall as a bulkhead, the same way the 2x build's pigtail does. Drill one hole for it and seal the outside N connection against rain.
Build steps
- Flash first. Go to flasher.meshcore.io, pick the RAK4631, and choose Repeater firmware. Set USA/Canada (Recommended). Our preset guide lists the expected values. Set a name, an admin password, and the location.
- Bench test with the antenna on. Never transmit without an antenna. Check from your companion that the repeater shows up and that it repeats. If it doesn't show up over Bluetooth, see managing a MeshCore repeater.
- Build the pack. Charge the cells to the same voltage first, then wire the holders in parallel, then connect the protection module, then the RAK. Check polarity at every step.
- Panel test. Meter the panel in full sun, connect it, and watch the RAK's red charge LED.
- Mount and seal. Install the bulkhead, vent, and glands, and set the plate in the box. Close the lid and leave it running in the yard for 3 to 5 days before you climb anything.
Rather buy one ready to go?
The Brazos Valley Mesh Solar Repeater Mesh Node is our turnkey version. It comes flashed with MeshCore or Meshtastic, your choice. Around Bryan–College Station, we recommend MeshCore. Our solar mesh node planning guide also covers power budgets and summer heat.
FAQ
What parts do I need for a DIY solar MeshCore repeater?
A RAK WisBlock Mini kit, 18650 cells in a parallel holder, a 1-cell protection module, a 5 V 6 W or 8 W panel, an outdoor 915 MHz antenna with an N-type bulkhead pigtail, and a vented outdoor box. It runs MeshCore or Meshtastic, your choice. Around Bryan–College Station, we recommend MeshCore repeater firmware on USA/Canada (Recommended).
2x or 6x?
The 2x is plenty for a sunny, easy-to-reach site. The 6x triples the reserve for hard-to-reach sites and gray stretches. It does not charge any faster, because the RAK's charger caps the current.
Do I need the cavity filter?
Only near strong transmitters such as cell towers, commercial rooftops, or shared masts. For a backyard repeater, spend that $65 on height instead.
Can I plug the solar panel straight into the RAK?
Yes, into USB-C or the JST ZH solar jack. Measure the panel in full sun first. RAK lists 5.5 V as the maximum on both.
Why not use a cheap protection board?
The ones we looked at cut off around 2.4–2.5 V, at or below the 2.5 V end voltage in the NCR18650GA specification. We use a module that cuts off at about 2.9–3 V per its listing, so the cells never get drained that far.
Related
- Build a solar mesh node that survives summer heat
- Heat, humidity, and lightning: proofing a solar mesh repeater
- $5 Harbor Breeze solar MeshCore node
Gear links
- RAK WisBlock Mini starter kit: Amazon · Rokland
- 5.8 dBi 915 MHz fiberglass antenna
- U.FL to N-female bulkhead pigtail: Amazon 2-pack · Rokland
- IP65 junction box, 5.9 x 3.9 in · IP67 junction box, 8.6 x 6.7 in
- 5 V 6 W solar panel · TangoSun 8 W 5 V solar panel
- Dual 18650 holders (sold out? ACEIRMC parallel 2-slot 6-pack)
- Panasonic/Sanyo NCR18650GA cells, 2-pack
- 1-cell protection module, about 2.9–3 V cutoff
- M12 breather vents: 4-pack · 2-pack
- 915 MHz cavity filter (optional) · U.FL to SMA-male pigtail, 5-pack
- SMA-male to N-female bulkhead cable, Rokland
- RAK12002 RTC, Rokland
- Pole-mount brackets · PG9 cable glands
- Consumables: USB-C male connectors · USB-C female 4-pin leads · M2 inserts · M3 inserts · Gorilla Clear Grip (sold out? Clear Grip 3 oz 2-pack) · Zinsser shellac (sold out? Bulls Eye shellac alt)
Prices were checked on Nov 1, 2026, and the cells, RTC, 8 W panel, SMA pigtail, and bulkhead cable on Nov 3, 2026. Prices move, so check each product page before you order. Lithium cells and outdoor wiring are your responsibility. If you are not comfortable building a pack, the shop version is there for that.